8.16.2020

ESP8266 based Glucose Monitor

I've created this little device for our bedroom to be able to always see the latest value and trend during the night. With this you don't need to grab your mobile phone to check the current value but it will simply be displayed. During the night it is dimmed down and during the day it is brighter. In case of a too low or too high value the brightness will be extrem bright and it starts blinking for 30 sec. In addition it will beep 5 times in case the value is too low.


ATTENTION:
Please be aware that you need to be able use a soldering iron. It's not really hard to assemble the whole thing but might need a bit of training to get the soldering right. Some of the boards below you can also buy in an assembled version (maybe all of them, I'm not sure).


These are the things you gonna need to build it up on your own. 

The feather wing tripler from Adafruit


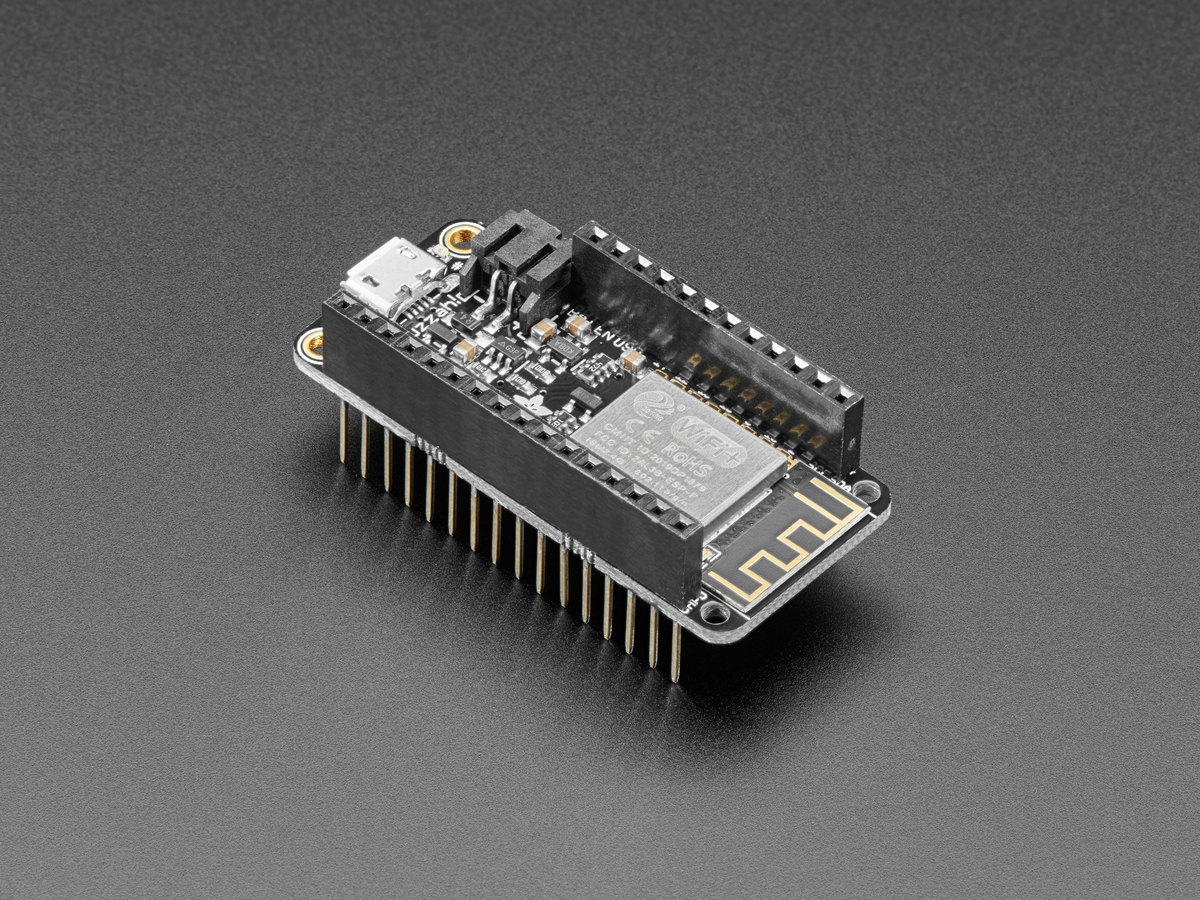
The Adafruit ESP8266 Feather Huzzah


The DS3231 precision real time clock from Adafruit.


The FeatherWing Proto board from Adafruit.


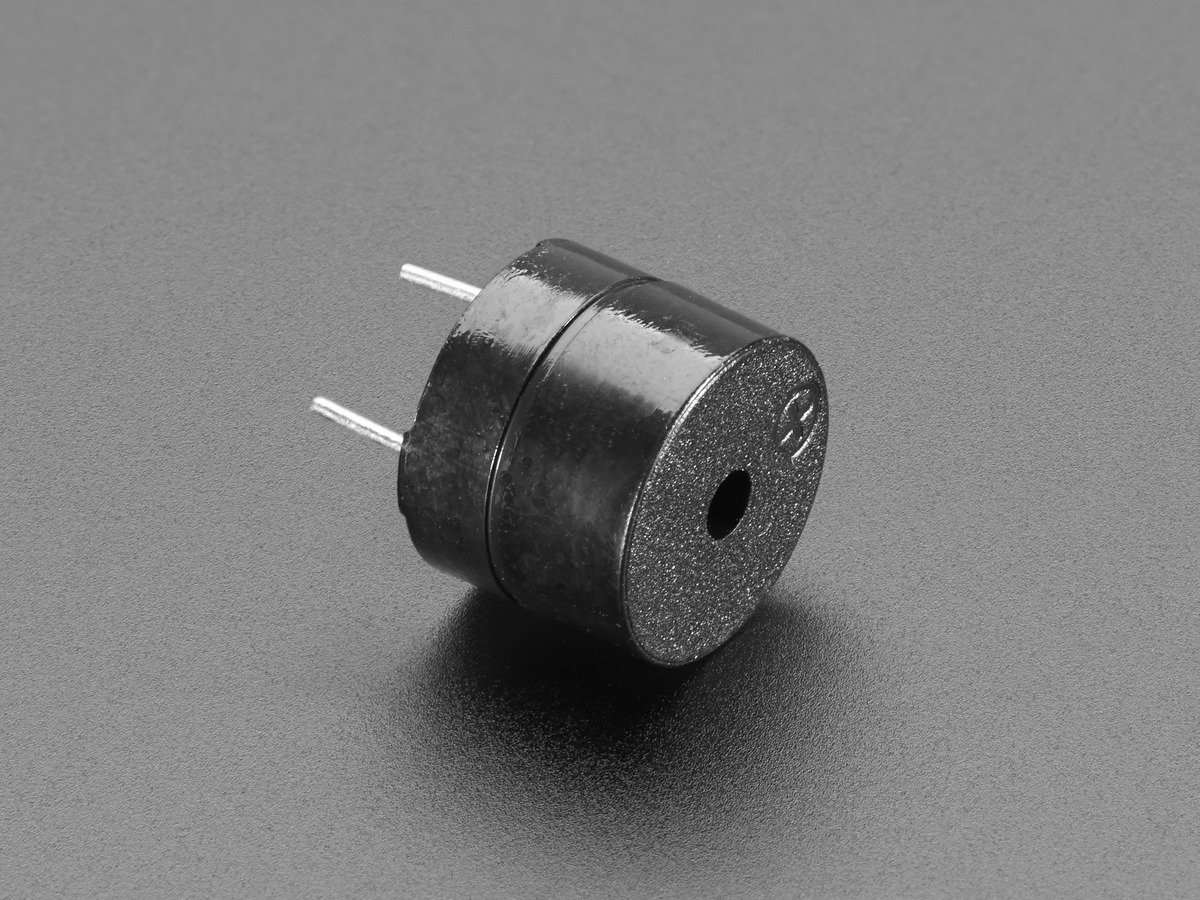
A piezo buzzer for the alarm. I'm using this one from Adafruit.


A MAX7219 8x32 four in one led module (you should choose the red color which is more convenient to look at in the night). I bought mine over at Amazon but will find them everywhere.


Some jumper wires (usually male/female should be enough but it depends on your MAX7219 board connectors).


Hook it all up...

The Buzzer will be put onto the Protoboard as shown on the image below. The Buzzer needs to be connected to PIN 15 of the ESP8266.

There is also a little tutorial over at Adafruit on how to hook up a buzzer to a ESP8266 Feathe Huzzah.


If you have finished this you simply can put the modules on the Tripler board as shown on the next image.


Now the next step will be connecting the MAX7219 board to the ESP8266 as shown on the image below.


You need to connect the following pins:

MAX7219                     ESP8266 Feather Huzzah

CLK (Orange)       ->           MOSI

CS (Green)           ->           RX

DIN (Yellow)         ->           MISO

GND (Brown)       ->           RTC

VCC (Red)           ->           3V


Now when all these things are done you can download the code from github.

If you open the code in your Arduino IDE you just need to edit 3 things.

  • In line 41 you need to put in the SSID (name) of your wifi network
  • In line 42 you need to put in the password for your network
  • In line 46 you need to put in the URL of your nightscout server
If you now compile the code you can deploy it to your connected ESP8266 Feather Huzzah and should hopefully see the current blood glucose value from your nightscout server.


8.12.2020

Gluco-Status

 Gluco-Status


Gluco-Status is an application that runs on your Mac. It visualizes blood glucose data that is coming from a nightscout server.
So you need to have your own nightscout server to be able to use Gluco-Status!
You can setup your own nightscout server by following this instructions.

Issues:
If you encounter problems running Gluco-Status, feel free to file an issue over at github.


In the meantime I've also created a Java/JavaFX application that offers the same functionality and which also runs on Windows and Linux.
Please find more info here.


Here are some screenshots of the applications.

OS X app:

Statusbar item


In the settings you need to set the address of your nightscout server (e.g. https://nightscout.herokuapp.com).

"Server unit mg/dl":
When setting up a nightscout server, you have to define the unit that the server should use. The standard of nightscout is mg/dl but you can change that to mmol/l. If you have choosen mg/dl for your nightscout server, please enable the switch "Server unit mg/dl".
In case you have choosen mmol/l for your nightscout server, please disable this switch.

"Unit mg/dl":
Whatever unit you have defined on your nightscout server you can change the display to either mg/dl or mmol/l. In case you would like to see the values in mg/dl, please enable the switch "Unit mg/dl". If you disable this switch the values will be shown in mmol/l.

"Low value notification":
Enable the switch if you would like to receive notifications for low values (in Gluco-Status acceptable low means values between min acceptable and 55 mg/dl which is min critical).

"Acceptable low value notification":
Enable the switch if you would like to receive notifications for acceptable low values (in Gluco-Status acceptable low means values between min normal and min acceptable values).

"Acceptable high value notification":
Enable the switch if you would like to receive notifications for acceptable high values (in Gluco-Status acceptable high means values between max normal and max acceptable values).

"High value notification":
Enable the switch if you would like to receive notifications for high values (in Gluco-Status high means values between max acceptable and 350 mg/dl which is max critical).


"Too low notification interval":
You can define the interval for notifications of too low values in a range of 5-10 minutes. In case of too low values you will receive notifications in the given interval.

"Too high notification interval":
You can define the interval for notifications of too high values in a range of 5-30 minutes. In case of too high values you will receive notifications in the given interval.

"Min acceptable":
The min acceptable value can be defined in the range of 60-70 mg/dl. 

"Min normal":
The min normal value can be defined in the range of 70-80 mg/dl. 

"Max normal":
The max normal value can be defined in the range of 120-160 mg/dl. 

"Max acceptable":
The max acceptable value can be defined in the range of 120-250 mg/dl. 


ATTENTION:
Too high and too low notifications will always be send.
In case the value is too high but the direction is either down or double down there won't be notifications. The same is true for values that are too low but the direction is up or double up.

8.10.2020

Gluco-Tracker

Gluco-Tracker

Gluco-Tracker is an application that runs on your iPhone, iPad or Mac. It visualizes blood glucose data that is coming from a nightscout server.
So you need to have your own nightscout server to be able to use Gluco-Tracker!
You can setup your own nightscout server by following this instructions.

Issues:
If you encounter problems running Gluco-Tracker, feel free to file an issue over at github.
 

Here are some screenshots of the applications.

iOS app:


In the settings you need to set the address of your nightscout server (e.g. https://nightscout.herokuapp.com).

"API secret":
If you have defined an api secret you can add it in the field api secret but usually that is not needed to access the nightscout instance for reading values.

"Token":
In nightscout you can define a token for things like reading data, writing data, admin etc. If you have defined a token to access your nightscout instance for reading, you need to put it in this field to make sure GlucoTracker can read the values.

"Unit mg/dl":
The GlucoTracker app assumes that your nightscout instance is configured to use mg/dl as base unit. If you would like to use mmol/l in the app, you simply set this switch to OFF and it will display all values in mmol/l.

"HealthKit":
If you granted GlucoTracker access to HealthKit, GlucoTracker can store your current blood glucose values to HealthKit so that you can access it from the Apple Health app. This might be useful to view values that are older than 7 days because GlucoTracker only shows you values from the last 7 days. 

"Too low" notification:
When enabled, GlucoTracker will send notifications if the blood glucose value is below 55 mg/dl. If you would like to get a sound added to the notification you also have to enable the sound switch.

"Low" notification:
Enable the switch if you would like to receive notifications for low values (in Gluco-Tracker acceptable low means values between min acceptable and 55 mg/dl which is min critical).

"Acceptable low" notification:
Enable the switch if you would like to receive notifications for acceptable low values (in Gluco-Tracker acceptable low means values between min normal and min acceptable values).

"Acceptable high" notification:
Enable the switch if you would like to receive notifications for acceptable high values (in Gluco-Tracker acceptable high means values between max normal and max acceptable values).

"High" notification:
Enable the switch if you would like to receive notifications for high values (in Gluco-Tracker high means values between max acceptable and 350 mg/dl which is max critical).

"Too high" notification:
Enable this switch if you would like to receive notifications for values higher than 350 mg/dl

"Too low notification interval":
You can define the interval for notifications of too low values in a range of 5-10 minutes. In case of too low values you will receive notifications in the given interval.

"Too high notification interval":
You can define the interval for notifications of too high values in a range of 5-30 minutes. In case of too high values you will receive notifications in the given interval.

"Min acceptable":
The min acceptable value can be defined in the range of 60-70 mg/dl. 

"Min normal":
The min normal value can be defined in the range of 70-80 mg/dl. 

"Max normal":
The max normal value can be defined in the range of 120-180 mg/dl. 

"Max acceptable":
The max acceptable value can be defined in the range of 120-250 mg/dl. 


"Too low notification as critical alert":
When enabled, GlucoTracker will send a critical alert notification in case the blood glucose is below 55 mg/dl. Critical alert notifications will even break through focus (e.g. do not disturb) or if you muted your phone. This is useful in case you monitor your child and the value gets too low over night. The sound of the critical alert notification sounds like this

Critical alert notification sound: <SOUND-LINK>


"Reminders":
Here you can define the life time of your catheter, sensor and pump battery. You can also decide if you would like to get a reminder for each of those three in case the lifetime expires. You can see the remaining days in the Timer Settings view.


Today widget:


The today widget always shows the latest value with the date/time of measurement, the increase/decrease to the last value and the current trend. Keep in mind that the widget can only be updated every 30 minutes. Apple restricts updating widgets to 50 times a day which is roughly every 30 minutes. Even this is not really guaranteed because I can only request to update the widget, the final decision when it really will be updated is made by the Apple AI on the phone.


Lock screen widgets:


You can choose between two different styles for the lock screen widget. For this widget the same rule applies as for the normal widget, no more than 50 updates a day which means not faster than every 30 minutes.


Apple watch app:


The watch app is a stand alone application which is not connected to the application on your phone. Therefor you have to set up the nightscout url, api secret and token also once on the watch.
Once you open the app, it will automatically get the latest value and will display it in a similar way as on the phone application. It will show you the last value, the delta to the former value, the unit and the date and time of the value.
The icon on the lower left corner will do a manual refresh and the icon on the lower right will open the settings. You can also switch between mg/dl and mmol/l if you like.


Apple watch complications:

These are the complications that are available on the Apple Watch, you can open the watch app by tapping on the complication.
The complications only show the last value from the watch app and won't be updated automatically. This might come in the future but at the moment that's the way it is. Tapping on a complication will open the watch app, which will automatically load the last value.


This is all the app has to offer and if you need more, please let me know in the comments :)


ESP8266 based Glucose Monitor